Are you a fan of the enticing aroma and bold taste of ginger?
Craving the convenience of having this exquisite root available at your fingertips?
Look no further, for this comprehensive guide is here to help you grow ginger in a pot, right at the comfort of your own home.
We will explore every step of the process, from choosing the appropriate ginger root and pot, to nurturing the plant and harvesting your home-grown aromatic delight.
With patience, attention, and proper care, you’ll soon experience the bliss of plucking fresh ginger from your very own plant.
Starting Your Ginger Journey: Selecting the Ginger Root and Container
The first step to cultivating ginger in a pot begins with choosing the right ginger root. This decision lays the foundation for the success and growth of your plant.
- Quality of the ginger root: Opt for a fresh, plump, and firm piece of ginger with several eye buds. These eye buds are the small protrusions from which the plant will sprout. Avoid roots that appear wrinkled, dry, or damaged. Purchasing organic ginger is also recommended, as conventional ginger may have been treated with growth inhibitors, which can hinder the sprouting process.
- Size of the ginger root: A larger ginger root will give you more opportunities for growth, as it will typically have more eye buds. You can also cut a large piece of ginger into smaller sections, each with at least one eye bud, to start multiple plants. However, always ensure that the cuts are clean and that the ginger is allowed to air-dry for a few hours before planting.
- Choosing the container: The container you select should be spacious enough to accommodate the growing ginger plant. Ginger grows horizontally, so a wide, shallow pot is ideal for its growth. Ensure that the pot has proper drainage holes to prevent waterlogging, which can harm the plant. A plastic or ceramic pot is preferable, as metal containers can get too hot for the delicate roots.
Planting the Ginger Root: Soil, Positioning, and Initial Care
After selecting the appropriate ginger root and container, it’s time to plant your ginger. In this section, we’ll discuss the soil requirements, positioning of the root, and initial care for your newly planted ginger.
- Soil requirements: Ginger thrives in well-draining, fertile, and slightly acidic soil. You can create your own potting mix by combining equal parts of high-quality potting soil, compost, and perlite or sand. This mixture will provide the necessary nutrients and aeration for the ginger plant.
- Positioning the ginger root: Place the ginger root in the pot with the eye buds facing upward. Cover the root with a 1-2 inch layer of potting mix. This shallow planting allows the sprouts to emerge easily from the soil.
- Initial care: Water the newly planted ginger carefully, ensuring that the soil is evenly moist but not waterlogged. Keep the pot in a warm, humid environment, ideally with a temperature between 75-85°F. A sunny, south-facing window or a spot with indirect sunlight will provide the warmth and light necessary for growth. It’s crucial to maintain consistent moisture in the soil, so make sure to water the plant regularly, avoiding both underwatering and overwatering. Patience is key here, as it might take a few weeks for the first sprouts to emerge.
Nurturing Your Ginger Plant: Ongoing Care, Feeding, and Watering
As your ginger plant starts to grow, it will require ongoing care, including feeding and watering, to ensure its continued growth and health. Follow these guidelines to properly nurture your ginger plant:
- Feeding: Ginger is a heavy feeder, requiring a steady supply of nutrients to support its growth. Apply a balanced, slow-release organic fertilizer every 4-6 weeks during the growing season. Alternatively, you can use a liquid organic fertilizer, diluted to half strength and applied every 2-3 weeks. Compost tea or worm castings are also excellent sources of nutrition for your ginger plant.
- Watering: Consistent moisture is essential for ginger plants. Check the soil regularly to ensure that it remains evenly moist, but not waterlogged. Water the plant when the top inch of soil starts to feel dry.Adjust your watering frequency based on the temperature and humidity levels, as well as the size and growth stage of the plant. Keep in mind that ginger plants require more water during their active growth period, which is typically from spring to early fall.
- Maintaining humidity: Ginger plants thrive in humid conditions, so it’s essential to maintain adequate humidity levels around the plant. You can achieve this by placing a tray filled with water and pebbles underneath the pot, which will release moisture into the air as the water evaporates. Misting the plant with water can also help to maintain humidity, but be cautious not to overdo it, as excessive moisture can lead to fungal issues.
- Pruning: As the ginger plant grows, it may require occasional pruning to keep it healthy and encourage new growth. Remove any yellow, brown, or damaged leaves as they appear, and trim back any overcrowded stems to allow for better air circulation and light penetration.
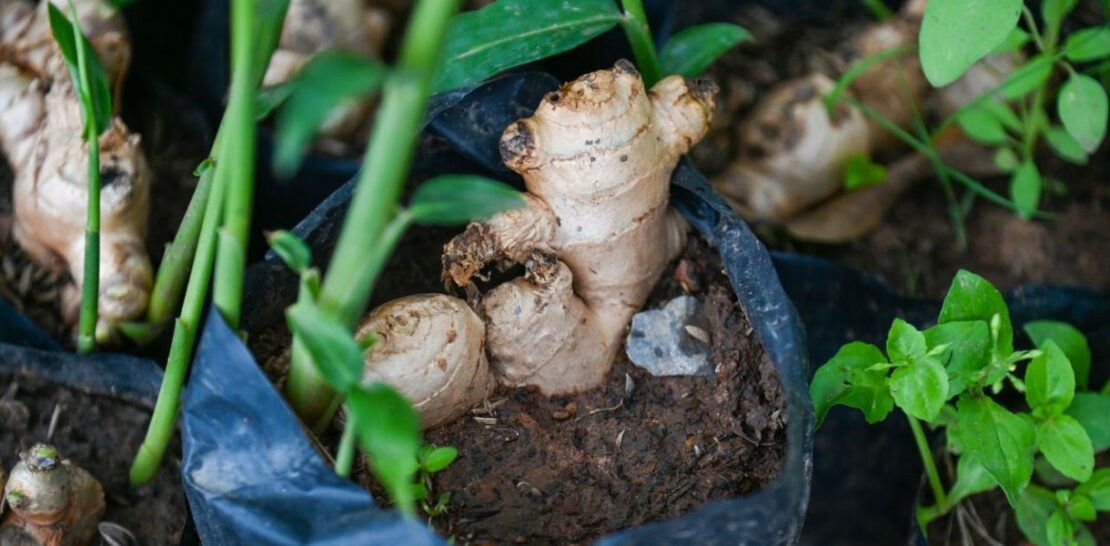
Harvesting Your Home-Grown Ginger: When and How to Reap the Aromatic Rewards
One of the most rewarding aspects of growing ginger in a pot is the moment when you can finally harvest your home-grown aromatic root. In this section, we’ll cover the timing, techniques, and post-harvest care for your ginger harvest.
- Timing: Ginger typically takes 8-10 months to reach maturity, although you might be able to harvest small, tender rhizomes as early as 4-6 months after planting. The leaves of the plant will start to yellow and die back as the ginger matures, signaling that it’s time to harvest. You can also gently dig around the edges of the pot to check the size of the rhizomes before deciding whether to harvest.
- Harvesting technique: Carefully remove the ginger plant from the pot, trying not to damage the rhizomes in the process. Gently brush off the soil and examine the rhizomes to determine which ones are ready for harvest. You can either harvest the entire plant or carefully break off individual rhizomes, leaving the rest of the plant intact to continue growing. If you choose the latter option, make sure to replant the remaining ginger back into the pot, covering the exposed rhizomes with soil.
- Post-harvest care: Rinse the harvested ginger under running water to remove any remaining soil, and then pat it dry with a clean towel. You can use the fresh ginger immediately or store it in a cool, dark place for up to 2-3 weeks. For longer storage, you can freeze the ginger whole, grate it and store it in an airtight container, or dry it in a food dehydrator or oven at low temperatures. Remember to save a few healthy rhizomes with eye buds for replanting, so you can continue to enjoy your home-grown ginger.
In conclusion, growing ginger in a pot can be a rewarding and aromatic experience, providing you with fresh, home-grown ginger at your fingertips. By following this comprehensive guide, from selecting the right ginger root and container to nurturing and harvesting your plant, you’ll be well on your way to cultivating a thriving ginger plant. With patience, care, and attention, you’ll soon be able to enjoy the bliss of harvesting your very own aromatic ginger root.